How To Draw My Melody: A Step-by-Step Guide For Beginners
Learning how to draw My Melody can be a delightful experience for fans of this adorable Sanrio character. Whether you're a beginner or someone looking to refine your drawing skills, this comprehensive guide will walk you through the process, step by step. My Melody, a sweet rabbit-like character, has captured the hearts of many with her cute design and charming personality. In this article, we will explore the various techniques and tips to help you create your own version of My Melody.
In this guide, you will find everything from basic shapes to advanced techniques that will enhance your drawing abilities. We will discuss essential tools, provide helpful resources, and even give you some creative ideas to personalize your drawings. By the end of this article, you will be well-equipped to draw My Melody confidently and creatively.
So, grab your sketchbook and pencils, and let’s dive into the wonderful world of drawing My Melody!
Table of Contents
- Introduction to My Melody
- Essential Tools for Drawing
- Understanding Basic Shapes
- Step-by-Step Drawing Process
- Coloring Your Drawing
- Personalizing Your My Melody Drawing
- Common Mistakes to Avoid
- Conclusion
Introduction to My Melody
My Melody is one of the beloved characters created by Sanrio, the same company that brought us Hello Kitty. Introduced in 1975, she is known for her sweet demeanor and her signature hood that resembles a rabbit's ears. My Melody's character is often depicted with a basket, wearing a pink or red hood, and a cheerful smile. Understanding her design is essential for anyone looking to draw her accurately.
As you embark on your journey to draw My Melody, it's important to observe her character traits and features. My Melody embodies cuteness and innocence, making her a favorite among fans of all ages. This article will help you capture that essence in your artwork.
Essential Tools for Drawing
Before you start drawing, it's essential to gather the right tools. Here’s a list of supplies you’ll need:
- Pencils (preferably HB and 2B for sketching)
- Eraser
- Fine liners or black pens
- Markers or colored pencils for coloring
- A sketchbook or drawing paper
Having the right materials can significantly affect your drawing experience, so make sure to choose quality tools that suit your style.
Understanding Basic Shapes
Drawing begins with shapes. To create My Melody, you’ll need to break down her figure into simple geometric shapes. Here’s how:
- The head can be drawn as a circle.
- The ears can be represented as two elongated ovals.
- The body can be a rounded rectangle.
These basic shapes serve as the foundation for your drawing, allowing you to build upon them as you refine your artwork.
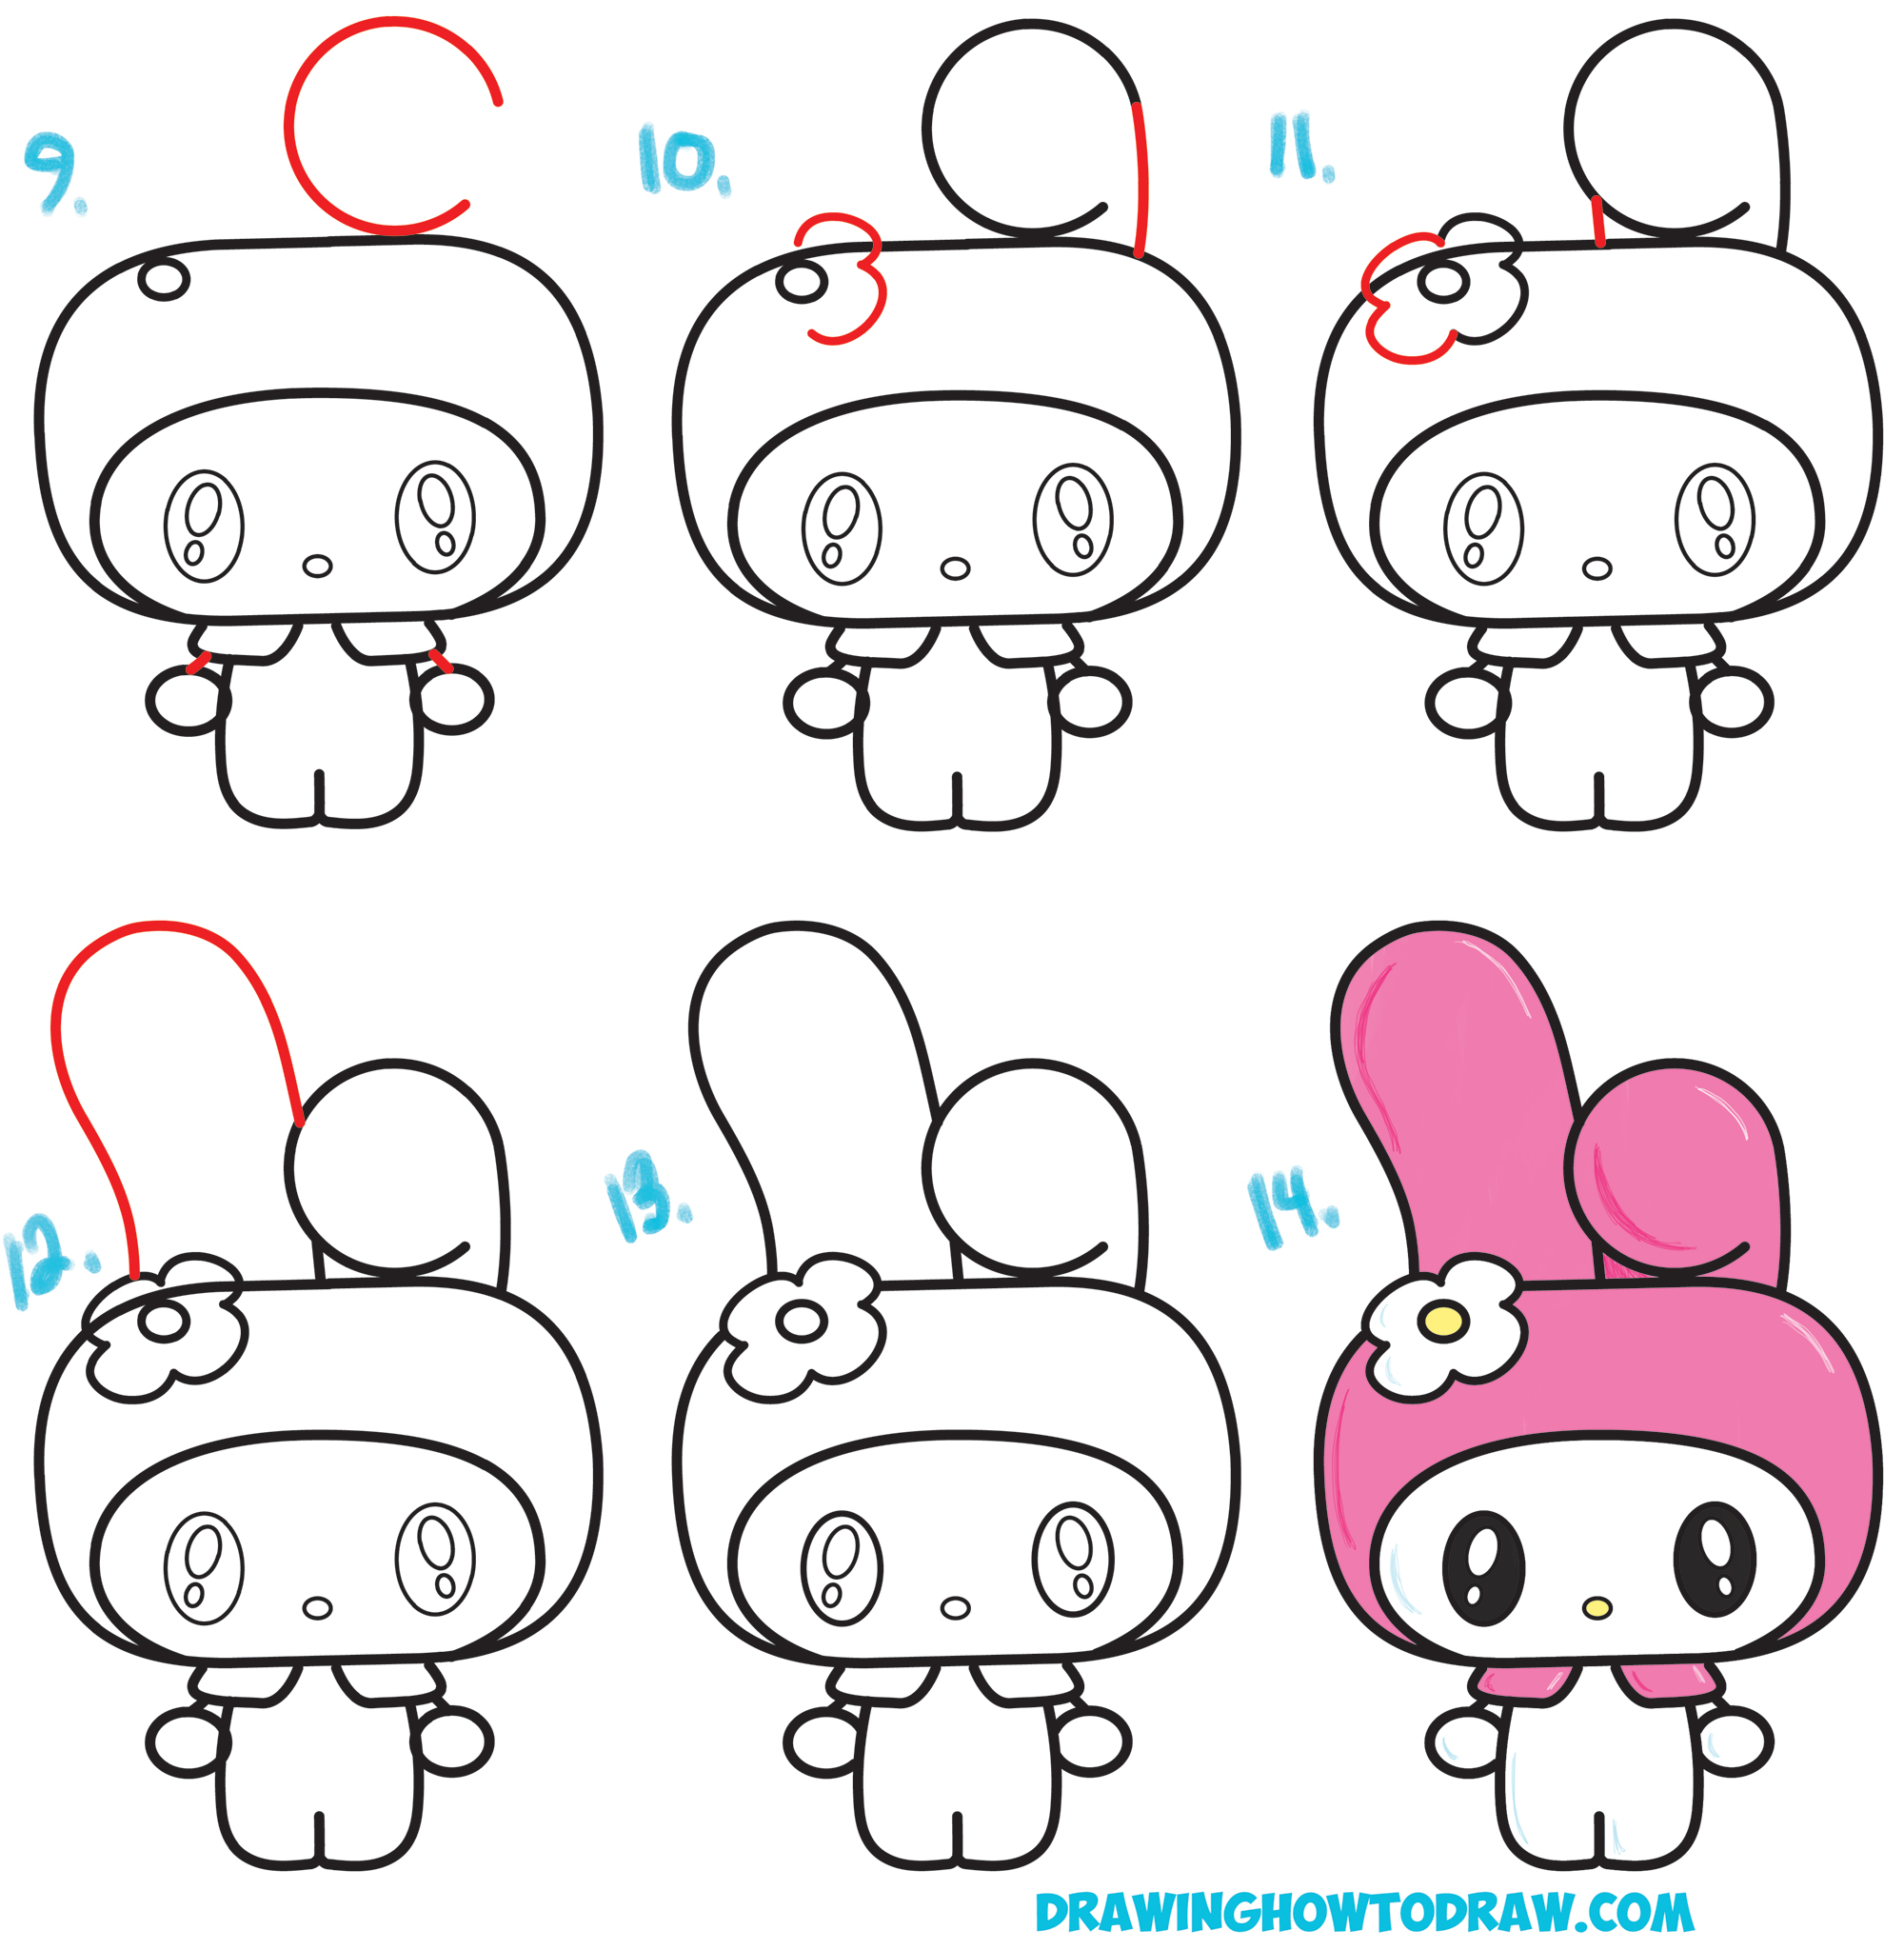
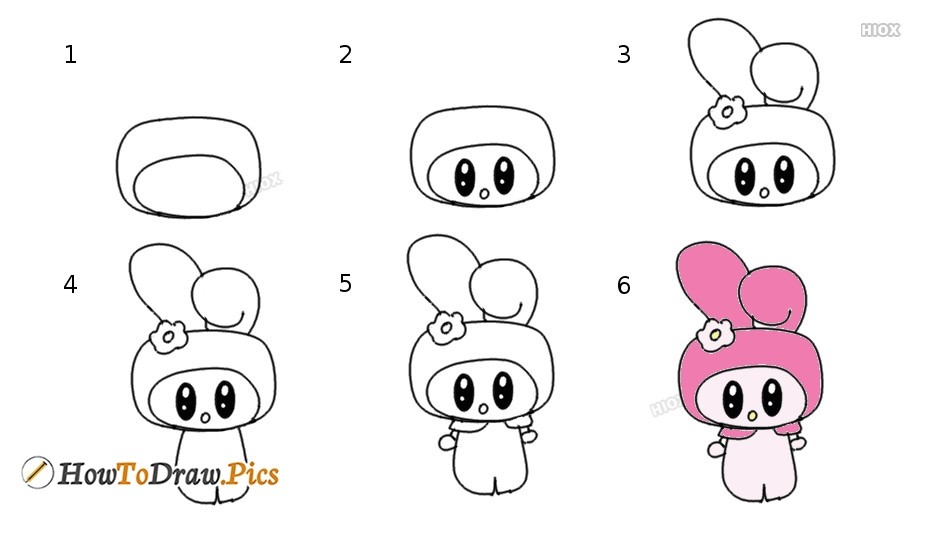
Step-by-Step Drawing Process
Now, let's break down the drawing process into manageable steps. Follow these instructions to create your own My Melody drawing.
Drawing the Head
Start by sketching a circle for My Melody's head. Make sure to keep your lines light, as you’ll refine them later. This circle forms the base of her head, where you'll add features such as her eyes and mouth.
Adding the Ears
Next, draw two elongated ovals on top of the head for her ears. These should curve slightly outward, giving them a playful appearance. Ensure that the ears are proportionate to the head.
Creating the Face Features
Once the head and ears are in place, it's time to add facial features. Draw two small circles for the eyes and a tiny “U” shape for the mouth. My Melody often has a gentle smile, so ensure that it reflects her cheerful nature.
Drawing the Body
After finishing the head, draw a rounded rectangle beneath it for the body. Add small arms and legs to complete her form. Again, keep your lines light for easy adjustments.
Coloring Your Drawing
Coloring is where your My Melody drawing truly comes to life. Use soft pastel colors for her outfit, typically pink or red. Here are some coloring tips:
- Use colored pencils or markers for vibrant colors.
- Layer colors to create depth.
- Don't forget to color her cheeks for a cute blush!
Personalizing Your My Melody Drawing
Once you’ve mastered the basic drawing, consider personalizing your My Melody. You can:
- Add different accessories, like a hat or a bow.
- Draw her in various outfits for different occasions.
- Create scenes with her friends or in different settings.
Personalization allows you to express your creativity and make your artwork unique.
Common Mistakes to Avoid
Even experienced artists make mistakes. Here are some common pitfalls to watch out for:
- Proportions: Ensure that the head and body are proportionate.
- Line Quality: Use consistent line thickness for a polished look.
- Overworking: Avoid erasing too much; instead, embrace imperfections.
Conclusion
In conclusion, learning how to draw My Melody can be a rewarding and enjoyable experience. By following the steps outlined in this guide, you can create adorable drawings that showcase your artistic skills. Remember to practice regularly and don't hesitate to personalize your artwork.
If you found this article helpful, please leave a comment below, share it with fellow fans, and check out other drawing tutorials on our site!
Final Thoughts
We hope this guide to drawing My Melody has inspired you to pick up your pencil and create something beautiful. Remember, the key to improvement is practice, so keep drawing and exploring your creativity. We look forward to seeing you back for more exciting content!
My Melody Drawing Tutorial
Hello Kitty Drawing at GetDrawings Free download
How to draw My Melody Cute step by step Drawing Photos
